
Multilingual: Easy Laravel localization with Svelte


Once your application reaches international communities localization is a thing to seriously consider. It can vastly improve the accessibility of your site and increase traffic at the same time by making it possible to use by more people!
As there are always multiple ways to achieve the same thing, in this case localization, I have compiled the instruction set to use localization with Laravel (and Svelte) without much work!
This post is largely based on the first Laravel + Svelte blog post and builds upon it. I recommend checking it out! You can also see the entire code of this guide in my GitHub repository. With that out of the way, let's get started!
Publishing missing language files
By default, Laravel doesn't expose any languages files, which prevents us from changing any of them. Luckily, there is a neat Artisan command to publish the needed files.
php artisan lang:publishCLI
After running the command, you should be able to see a new directory: lang. It contains the following files:
These are all default Laravel language files for back end validation and similar.
Installing Laravel Translator
To get these files usable in our front end, we have to use a third party package called laravel-translator which lets us access our localized strings within Svelte. To install it, run the following command:
npm install -D laravel-translatorCLI
Next, we have to update our vite.config.js by adding the laravelTranslator import and adding that to the plugin list. If you started off from the first Laravel + Svelte blog post, you are able to copy and paste the entire following code. Alternatively add the two changed lines to your config.
import { defineConfig } from 'vite';
import laravel from 'laravel-vite-plugin';
import { svelte } from "@sveltejs/vite-plugin-svelte";
import laravelTranslator from "laravel-translator/vite";

export default defineConfig({
    plugins: [
        laravel({
            input: ['resources/css/app.css', 'resources/js/app.js'],
            refresh: true,
        }),
        svelte({}),
        laravelTranslator(),
    ],
});
vite.config.js
Finally, we need to adjust our app.blade.php in the resources/views directory to properly contain the desired language. We need to replace the opening html tag with the following: <html lang="{{ app()->getLocale() }}">. To also add a fallback locale, which is really useful for incomplete community translations, add the following:
<script>
    window.fallbackLocale = "{{ config('app.fallback_locale') }}"
</script>
Your Blade view should then look something like this:
<!DOCTYPE html>
<html lang="{{ app()->getLocale() }}">
<script>
    window.fallbackLocale = "{{ config('app.fallback_locale') }}"
</script>
<head>
    <meta charset="utf-8" />
    <meta name="viewport" content="width=device-width, initial-scale=1.0, maximum-scale=1.0" />
    @vite('resources/js/app.js')
    @inertiaHead
</head>
<body>
@inertia
</body>
</html>
resources/views/app.blade.php
Adding translations
Let's add some translations! You can use two different file types to add translations: JSON and the regular PHP files. Personally, I prefer the JSON approach, but choosing a file type is your decision.
First, create an en.json file in the lang directory which will contain all our custom translations for the English language. We can now populate it with the different types of localization:
{
    "projectName": "Laravel + Svelte",
    "greeting": "Hello, World!",
    "greetingWithName": "Hello, :name!",
    "greetingWithAge": "Hi :name, you are :count year old.|Hi :name, you are :count years old.",
    "userCount": "{0}There are no users online!|{1}There is one user online!|[2,Inf]There are :count users online!"
}
lang/en.json
This contains simple translation, parameterized translations (:name) and pluralized translations covering most types of translations. Parameters are defined with a leading colon like this: :param.
If you just want to differentiate between one (1) and many (2+) in your translation, you can simply use a pipe symbol (|) to split the string. The first part will be used when there is only one of the :count, and the second part when there are more than one.
Additionally, you have the possibility to define translations for exact amounts with {amount} as seen in the userCount translation. Check out the official Laravel documentation to see all possible pluralization techniques.
Usage
If you are following the first Laravel + Svelte blog post, you should be familiar with the Index.svelte in the resources/js/Pages/Home directory. We will use that file to test our new translations.
Firstly, we need to import the various translation functions. Realistically, you will only need two, but it's good to have seen all of them in use.
<script>
    import {__, t, trans, trans_choice} from "laravel-translator"
</script>
Here is an example Index.svelte with all translation functions in use:
<script>
    import Layout from "../Layouts/App.svelte"
    import {__, t, trans, trans_choice} from "laravel-translator"
    let { name, age } = $props();
</script>

<Layout>
    <div class="text-center font-bold text-xl">
        <h1 class="text-4xl">{__('projectName')}</h1>
        <p class="text-2xl">{trans('greeting')}</p>
        <p>{t('greetingWithName', {name})}</p>
        <p>{trans_choice('greetingWithAge', age, {name})}</p>
        <p>{trans_choice('userCount', 0)}</p>
        <p>{trans_choice('userCount', 1)}</p>
        <p>{trans_choice('userCount', 2)}</p>
    </div>
</Layout>
resources/js/Pages/Home/Index.svelte
The name and age properties are still left over from the first blog post, and we will insert them into translated strings.
The functions __, t and trans do exactly the same. The first argument is a translation key we defined in the en.json. If required, the second parameter contains all variables to replace in the translations. If your variable and the parameter in the translation are called the same, you can just pass the variable. Otherwise define it as follows: {name: otherName}.
The pluralization functions behave a little differently. The second parameter is the number which should be localized. That number is then available as the :count parameter in the localization file. The third parameter is the same as the second parameter from the regular function and contains the variables to pass to the localized string.
With all that figured out, we can try to see it in action by running composer run dev!
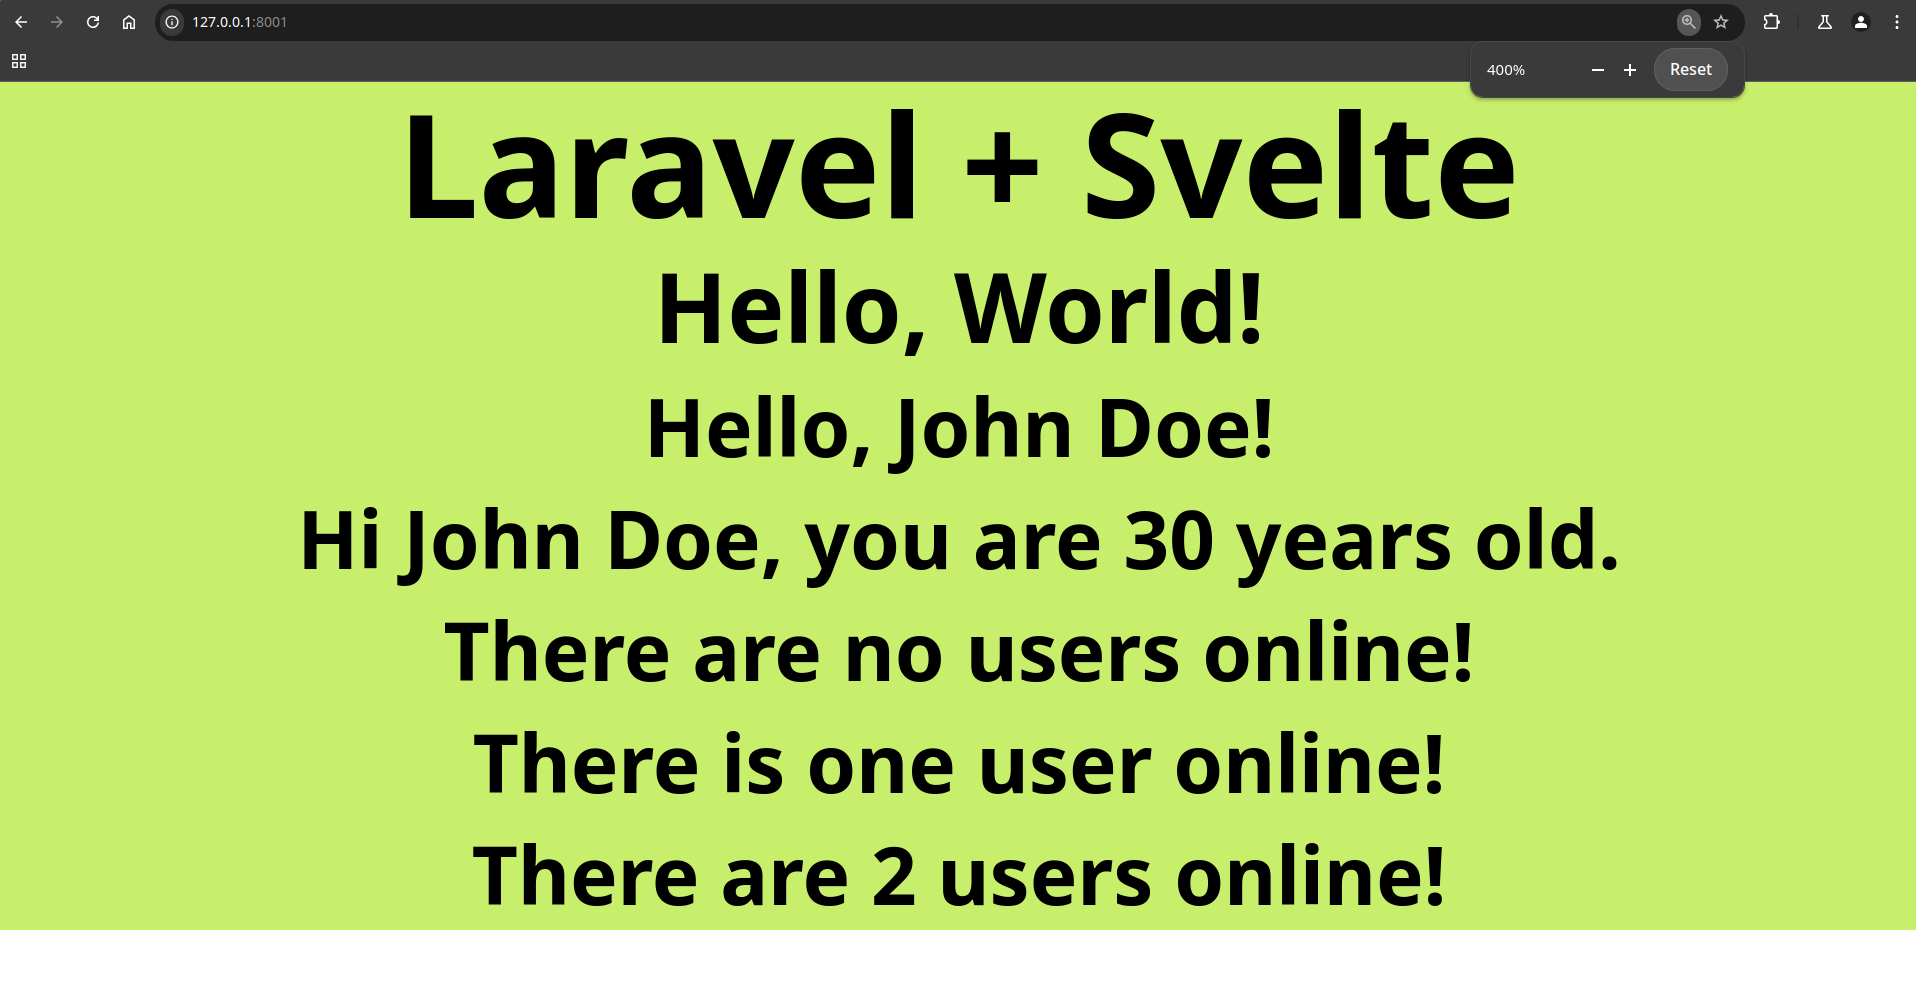
Moreover, changing the age variable passed down by the back end will have an immediate result in the web page:

Adding another language
Last but not least, we have to add a different language. We are doing localization after all. For this example, I will add German translations. To get started, we have to create a new file in the lang directory, in my case called de.json. Let's fill it with translated strings!
{
    "projectName": "Laravel und Svelte",
    "greeting": "Hallo, Welt!",
    "greetingWithName": "Hallo, :name!",
    "greetingWithAge": "Hi :name, du bist :count Jahr alt.|Hi :name, du bist :count Jahre alt.",
    "userCount": "{0}Es sind keine Benutzer online!|{1}Es ist ein Benutzer online!|[2,Inf]Es sind :count Benutzer online!"
}
lang/de.json
Changing the default locale in the .env file to de will change the language on the web page:
APP_LOCALE=de.env
And indeed, the changes show, and the pluralization works as expected!
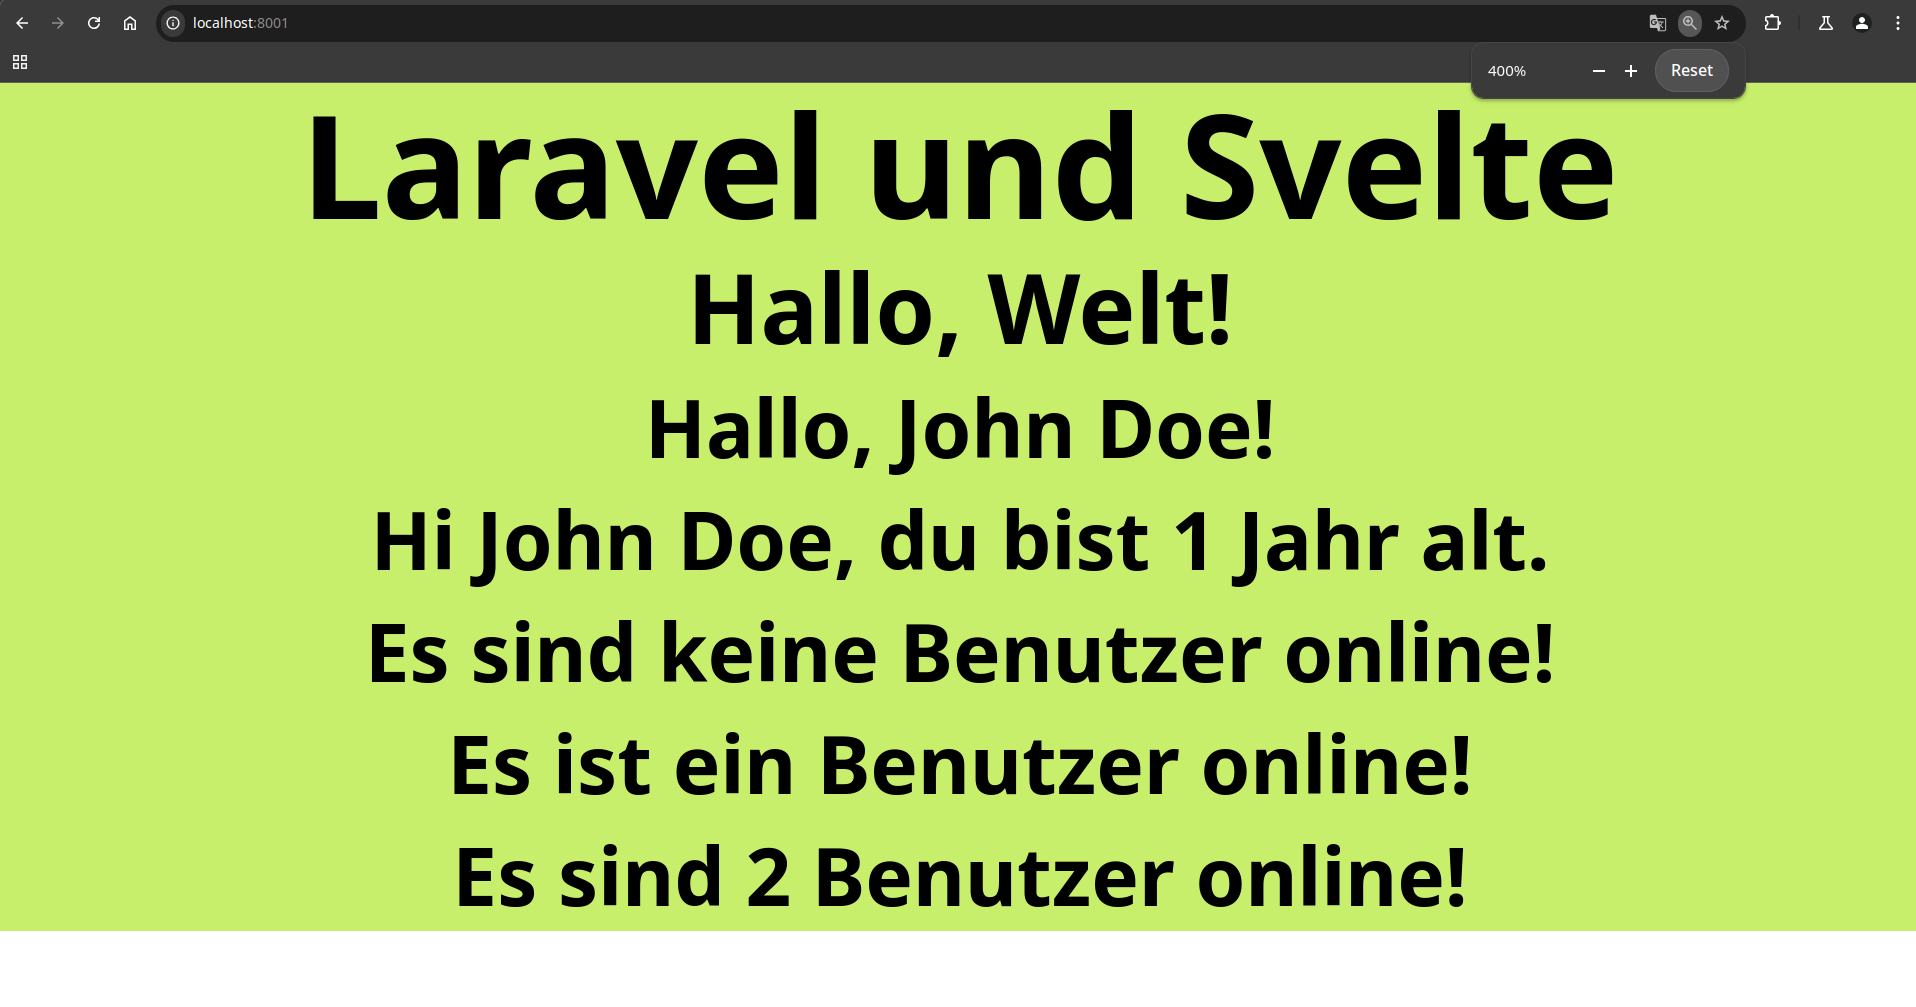
Furthermore, since we added the fallback locale, any localization keys that haven't been translated in German, will be shown in the English translation!
And that's all! You have successfully added localization to your Laravel and Svelte website! If this guide has intrigued you, I recommend take a look at adding Shadcn-Svelte to that project which provides a great amount of useful and beautiful UI components.
Lastly, I want to point out that all code used here is publicly available on the localization branch of the laravel-svelte GitHub repository!
If you liked this guide and want to see more of these in the future and be notified when a new one releases, consider signing up for our free newsletter! Thank you.